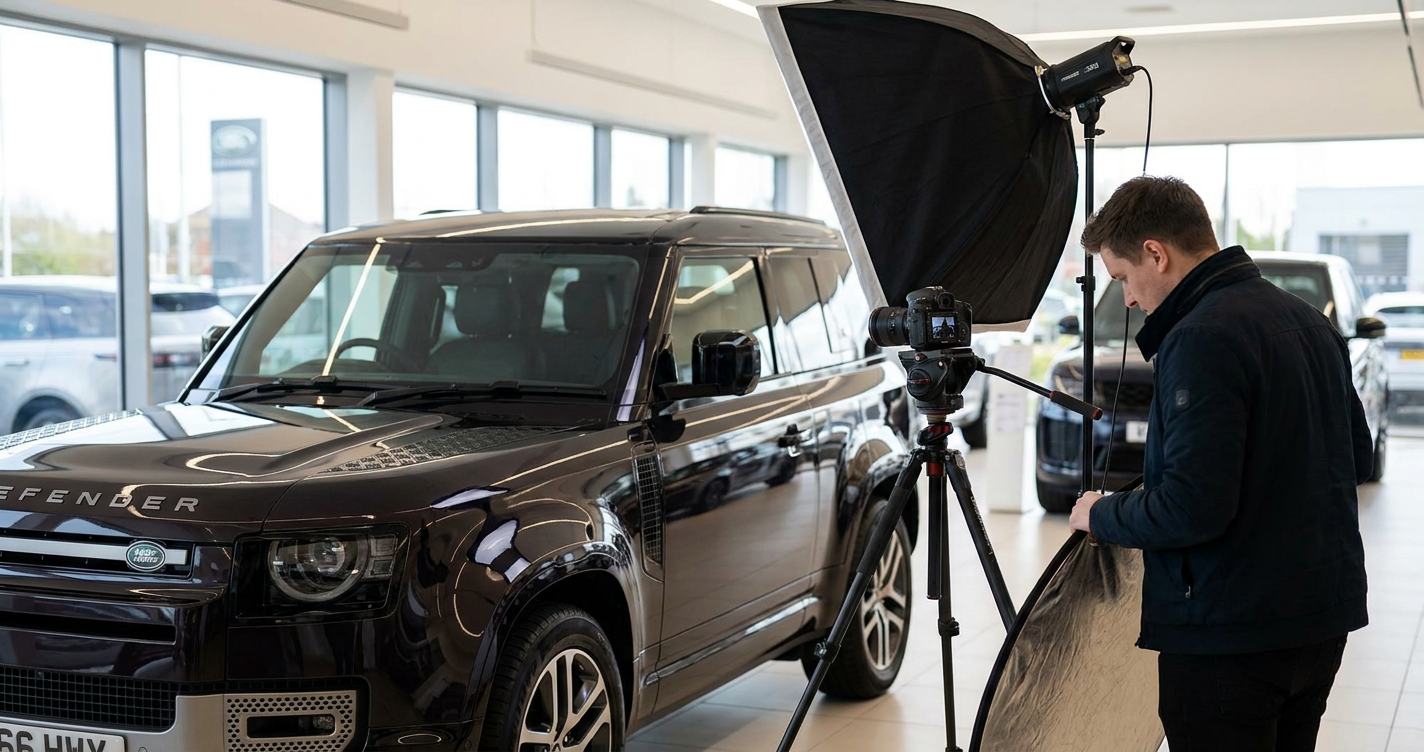
Why Vehicle Photography Matters for Online Listings
Professional-quality photographs directly influence conversion rates on vehicle listings, with buyers forming initial judgements within three seconds of viewing an image. Dealers who invest time in proper photography see measurably higher enquiry rates compared to those using poorly lit, cluttered, or incomplete image sets. The visual presentation of stock determines whether a potential buyer clicks through to your website or scrolls past to a competitor's listing.
Buyers cannot physically inspect vehicles during the initial research phase, making photographs the primary decision-making tool. A comprehensive image set builds trust, reduces unnecessary enquiries about cosmetic condition, and pre-qualifies serious buyers who have already assessed the vehicle's appearance. Poor photography, conversely, raises suspicions about hidden damage or unprofessional dealership practices, regardless of the vehicle's actual condition.
The relationship between image quality and listing performance extends beyond traditional classified platforms. As AI search engines and voice assistants become more sophisticated, they increasingly analyse image content to verify listing accuracy and assess dealer credibility. Platforms that route traffic directly to dealer websites rather than retaining users on marketplaces place even greater emphasis on first-impression photography.
Essential Equipment for Dealer Vehicle Photography
A modern smartphone with a 12-megapixel or higher camera produces acceptable results for online vehicle listings when used correctly. Dedicated digital cameras offer advantages in low-light conditions and manual exposure control, but the best camera for dealer photography is the one you have available and know how to operate consistently.
A basic equipment kit should include a microfibre cloth for removing fingerprints and dust, a small stepladder for elevated angles, and lens-cleaning materials. Polarising filters reduce windscreen reflections and enhance paint depth on sunny days, though they require cameras with threaded lens mounts. Avoid flash photography entirely, as direct flash creates harsh shadows, washes out paint colours, and produces unnatural reflections on glass and chrome surfaces.
Image stabilisation technology, available in most recent smartphones and cameras, reduces blur from hand movement during shooting. For dealers photographing multiple vehicles daily, a lightweight tripod ensures consistent framing and allows slower shutter speeds in overcast conditions without introducing camera shake.
Choosing the Right Location and Background
Photograph vehicles in open areas with unobstructed sky above, allowing natural light to illuminate all surfaces evenly. Car parks with painted bays, forecourts with visible signage, and areas cluttered with other vehicles create distracting backgrounds that draw attention away from the subject. Plain tarmac, neutral paving, or short grass provides clean backgrounds that keep focus on the vehicle itself.
Avoid positioning vehicles against buildings, fences, or walls, which cast shadows and create compositional imbalance. A minimum of three metres clearance on all sides allows proper perspective and prevents background elements from appearing to emerge from the vehicle's roofline. Dealers with limited forecourt space can use public car parks during quiet periods, though this requires moving vehicles off-site.
Consistency in location choice creates a recognisable visual identity across your stock listings. Buyers browsing multiple vehicles from the same dealer subconsciously register professional presentation standards, building confidence in the dealership's overall operation. This consistency also streamlines the photography process, as you develop familiarity with optimal positioning and lighting conditions at your chosen location.
Optimal Lighting Conditions for Vehicle Photography
Photograph vehicles during the two hours after sunrise or the two hours before sunset, when natural light is soft, directional, and produces minimal harsh shadows. This golden-hour lighting enhances paint depth, reduces glare on glass surfaces, and creates subtle highlights that define body lines and panel contours. Midday overhead sun creates unflattering shadows under wheel arches and bumpers whilst washing out paint colours.
Overcast days with complete cloud cover provide excellent diffused lighting for vehicle photography, eliminating harsh shadows entirely whilst maintaining even illumination across all surfaces. Contrary to common assumption, bright sunshine is not ideal for automotive photography. Heavy cloud acts as a natural softbox, producing professional results without specialised lighting equipment.
Never photograph vehicles in direct rain, as water droplets on paintwork and glass create distracting spots in images. Light drizzle that keeps surfaces damp without visible droplets can enhance paint reflection and colour saturation, though this technique requires careful timing and immediate shooting before surfaces dry unevenly.
Standard Angles and Shots for Complete Coverage
Every vehicle listing requires a minimum of twelve photographs covering standard angles that buyers expect to see. Begin with a front three-quarter view showing the driver's side front corner at approximately 45 degrees, positioned to display both the front grille and side profile simultaneously. This angle serves as the primary listing image and should showcase the vehicle's best features.
Capture the rear three-quarter view from the driver's side rear corner, maintaining the same 45-degree angle for visual consistency. Shoot directly from the side at door-handle height, ensuring the camera is level with the ground to prevent perspective distortion. Repeat for the passenger side, providing buyers with a complete external view of the vehicle's condition.
Front and rear elevation shots, taken from directly ahead and behind the vehicle, document registration plates, lighting clusters, and bumper condition. Photograph all four wheel arches individually, capturing tyre tread depth, alloy wheel condition, and brake disc appearance. These detail shots address specific buyer concerns and reduce enquiries about cosmetic condition.
Interior Photography Techniques
Open all doors and photograph the interior from the driver's side rear door opening, capturing the dashboard, steering wheel, front seats, and centre console in a single frame. This establishing shot provides context for the vehicle's overall interior condition and layout. Shoot from a slightly elevated position rather than ground level to reduce perspective distortion and provide a natural viewing angle.
Capture the rear seating area from the front passenger door opening, showing legroom, seat condition, and rear amenities. Photograph the boot or load area with the tailgate fully open, including a shot with rear seats folded if applicable. These images address practical buyer questions about cargo capacity and interior versatility.
Document dashboard instrumentation, infotainment screens, and control interfaces with close-up shots that show current mileage and system functionality. Ensure screens are powered on and displaying the main menu rather than warning messages or blank displays. Clean all interior surfaces before photography, as dust, fingerprints, and debris appear magnified in close-up images.
Engine Bay and Mechanical Detail Shots
Photograph the engine bay from directly above with the bonnet fully raised, ensuring even lighting across all components. This shot reassures buyers about general mechanical condition and cleanliness, though few buyers possess the technical knowledge to assess mechanical health from photographs. A clean, well-maintained engine bay suggests careful ownership and regular servicing.
Capture the vehicle identification number (VIN) plate, typically located on the driver's side door pillar or dashboard corner, to provide verification for buyers conducting pre-purchase checks. Photograph service books, spare keys, and original documentation alongside the vehicle, demonstrating completeness and supporting the listing description.
For commercial vehicles and vans, additional detail shots of load area tie-down points, bulkhead condition, and any fitted racking or equipment address specific buyer requirements. The relationship between detailed photography and buyer confidence is particularly strong in the commercial sector, where vehicles represent business tools rather than personal purchases.
Common Photography Mistakes Dealers Make
Photographing vehicles with open doors, raised bonnets, or extended wing mirrors in primary listing images creates an unprofessional appearance and suggests incomplete preparation. Close all openings, retract mirrors to their driving position, and ensure wheels are straight before shooting external angles. These details signal attention to presentation standards.
Digital zoom degrades image quality significantly, producing pixelated results that appear unprofessional in online listings. Move closer to the subject rather than using zoom functions, maintaining a minimum distance of two metres for full-vehicle shots to prevent perspective distortion. Modern listing platforms display images at various sizes, and poor-quality photographs become increasingly apparent on larger screens.
Inconsistent image orientation, mixing portrait and landscape formats within a single listing, creates a disjointed viewing experience as buyers navigate through photographs. Shoot all images in landscape orientation, which matches the aspect ratio of most online listing platforms and provides better coverage of vehicle proportions.
The debate between stock photography and real photos has been settled decisively in favour of authentic images. Buyers recognise manufacturer press photos immediately and interpret their use as an attempt to conceal condition issues, regardless of the dealer's actual intention.
Image Editing and Enhancement Best Practices
Basic exposure correction and colour balance adjustment improve image quality without misrepresenting vehicle condition. Brighten underexposed images slightly and correct colour casts caused by artificial lighting, but avoid aggressive editing that alters paint colours or conceals cosmetic damage. Buyers who discover discrepancies between listing photographs and actual vehicle condition lose trust in the dealership entirely.
Crop images to remove distracting background elements and improve composition, maintaining the vehicle as the central focus. Straighten horizons and vertical lines to correct perspective distortion, particularly in interior shots where tilted angles create an unsettling viewing experience. These subtle corrections enhance professionalism without crossing into misrepresentation.
Resize images to match listing platform requirements, typically between 1,200 and 2,000 pixels on the longest edge. Larger file sizes slow page loading times without providing visible quality improvements on screen, whilst smaller images appear pixelated when displayed at full width. Consistent image dimensions across all listings create a cohesive visual presentation.
Seasonal and Weather Considerations
Winter photography in the UK presents challenges with shorter daylight hours and frequent overcast conditions. Schedule photography sessions during the limited golden-hour windows, typically between 8-10am and 2-4pm during December and January. Overcast winter light, whilst flat, provides consistent illumination without harsh shadows, making it workable for vehicle photography when bright conditions are unavailable.
Wet weather creates reflective surfaces that can enhance paint depth and colour saturation when managed correctly. Photograph vehicles immediately after rain stops, whilst surfaces remain evenly damp but before water pools or runs unevenly. This technique requires speed and timing but produces striking images that stand out in listings.
Snow and ice present significant challenges, creating white balance issues and obscuring vehicle details. Clear all snow from vehicles before photography, and avoid shooting during active snowfall. If winter conditions are unavoidable, increase exposure compensation slightly to prevent snow from appearing grey in images.
Creating Consistent Visual Standards Across Stock
Develop a standardised shot list that you follow for every vehicle, regardless of category or price point. Consistency in angle selection, background choice, and image order creates a professional portfolio that buyers recognise across your listings. This standardisation also improves efficiency, as the photography process becomes routine rather than requiring creative decisions for each vehicle.
Maintain consistent editing styles across all images, applying the same exposure, contrast, and colour balance adjustments to create visual cohesion. Buyers browsing multiple vehicles from the same dealer should see a unified presentation standard that reinforces brand professionalism. Inconsistent editing styles, where some vehicles appear bright and saturated whilst others look dull and underexposed, suggest variable attention to detail.
The connection between compelling vehicle listings and professional photography is inseparable. Well-written descriptions lose impact when paired with poor images, whilst excellent photographs can partially compensate for basic descriptions by allowing buyers to assess condition visually.
Photography Workflow for High-Volume Dealers
Establish a dedicated photography station on your forecourt with consistent background and lighting conditions, allowing rapid processing of incoming stock. Photograph vehicles immediately upon preparation completion, whilst they are clean and before they accumulate dust or are moved to less accessible storage locations. Delayed photography creates bottlenecks in the listing process and reduces stock visibility.
Batch-process images from multiple vehicles simultaneously, applying consistent editing adjustments and resizing operations to streamline workflow. Photo editing software with batch processing capabilities reduces editing time from minutes per vehicle to seconds, making professional presentation achievable even for dealers listing dozens of vehicles weekly.
For dealers managing both cars and motorbikes, the principles of effective photography remain consistent across categories. Selling motorbikes online requires the same attention to lighting, angles, and detail shots, though motorcycles benefit from additional close-ups of instrumentation, exhaust systems, and chain condition.
Mobile Photography Apps and Tools
Smartphone camera apps with manual exposure control allow fine-tuning of shutter speed, ISO, and white balance beyond automatic mode capabilities. These adjustments prove valuable in challenging lighting conditions where automatic modes produce inconsistent results. Lock exposure and focus on the vehicle rather than allowing the camera to adjust continuously as you compose the shot.
Photo editing apps designed for mobile devices provide sufficient adjustment tools for basic exposure correction, cropping, and perspective correction without requiring desktop software. Cloud-based editing services allow processing images on mobile devices whilst travelling between locations or during quiet periods, improving workflow efficiency.
Image management apps help organise photographs by vehicle, automatically renaming files with registration numbers or stock codes to prevent confusion when uploading to listing platforms. This organisation becomes critical for dealers managing large inventories across multiple categories.
How Photography Supports Direct-to-Dealer Traffic Models
Platforms that route buyers directly to dealer websites rather than retaining traffic on marketplace environments place greater emphasis on first-impression photography. Buyers clicking through to your site have already made an initial judgement based on listing images, and the photographs on your own website must reinforce that positive first impression to convert enquiries.
Professional photography reduces bounce rates on dealer websites by confirming that the vehicle matches listing expectations. Buyers who encounter consistent, high-quality images across listing platforms and dealer websites develop confidence in the dealership's presentation standards and are more likely to proceed with enquiries. This consistency matters particularly for dealers using free listing platforms where competition for buyer attention is intense.
The investment in photography equipment and skills pays ongoing dividends through improved conversion rates and reduced time-to-sale. Unlike subscription fees or commission charges that represent pure cost, photography capability is a permanent asset that improves listing performance across all platforms simultaneously.
Frequently Asked Questions
How many photos should a vehicle listing include?
A minimum of twelve photographs provides adequate coverage for most vehicles, including exterior angles (front three-quarter, rear three-quarter, both sides, front, rear), four wheel arches, interior overview, dashboard detail, boot area, and engine bay. Higher-value vehicles or those with unique features benefit from 15-20 images that document condition comprehensively. Buyers interpret sparse image sets as attempts to conceal condition issues, whilst comprehensive coverage builds confidence and reduces unnecessary enquiries.
Should I photograph vehicles with number plates visible?
Display registration plates clearly in listing photographs, as buyers use visible plates to conduct independent history checks before enquiry. Obscuring plates raises suspicions about vehicle history and suggests the dealer has something to hide. DVLA regulations prohibit displaying vehicles for sale without visible registration plates, and listing platforms increasingly require plate visibility for verification purposes. The plate provides essential information that buyers need during research.
Can I use the same photos across multiple listing platforms?
Using identical photographs across all listing platforms ensures consistency and maximises the return on photography effort. Buyers researching vehicles across multiple platforms recognise consistent imagery as a sign of professional operation, whilst different photos for the same vehicle on different platforms create confusion and suggest potential misrepresentation. Standardised images also streamline the listing process when using platforms that integrate with dealer management systems.
What's the best time of day to photograph vehicles?
The two hours after sunrise and two hours before sunset provide optimal natural lighting conditions, with soft directional light that enhances paint depth and minimises harsh shadows. Overcast days with complete cloud cover offer excellent diffused lighting throughout the day, eliminating the time constraints of golden-hour photography. Avoid midday photography when overhead sun creates unflattering shadows and washes out colours, and never photograph in direct artificial lighting, which produces unnatural colour casts.
Do I need professional photography equipment or will a smartphone work?
Modern smartphones with 12-megapixel or higher cameras produce acceptable results for online vehicle listings when used with proper technique, lighting, and composition. Professional cameras offer advantages in manual control and low-light performance but require greater investment and technical knowledge. The most important factors in vehicle photography are lighting conditions, background selection, and consistent angle coverage rather than equipment specifications. Many successful dealers use smartphones exclusively, focusing effort on technique rather than equipment.